Every year, around this time, I go into wardrobe crisis mode. I'm 100% over coats and jackets and bundling up to go outside. But I need more than just a tee. And I still want to be comfortable. But I also want to look somewhat put together. Like I said - getting dressed in the morning is complicated.
Enter the Halifax Hoodie from Hey June Handmade! It's the perfect combination of comfort and style. Plus, there's five (yes, FIVE) different views for any occasion.

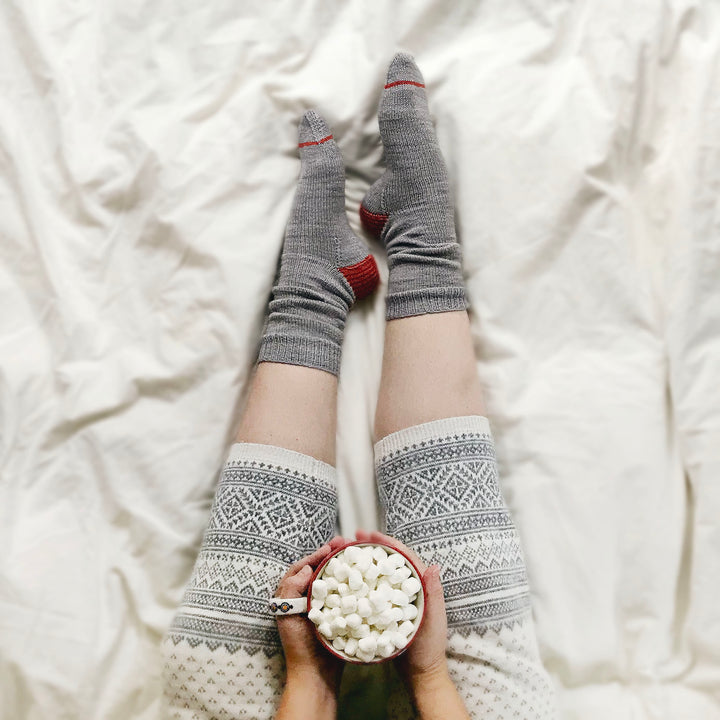
I made mine out of our newly released Bamboo French Terry. This fabric is extremely soft to the touch with a beautiful drape to it - but it also has amazing recovery and is easy to work with.
I decided to make View D, the cowl neck hoodie with a kangaroo pocket. However, I left out the drawstring at the neck; I have a really hard time with turtlenecks or anything tight around my neck, so I wanted to avoid that feeling.
Looking back, I probably should have sized down one size smaller than my measurements call for, due to the drape and ease of the fabric. If I were using something more stable, like a sweatshirt fleece or something, this size probably would have been perfect! I still love it, but it does feel just a little too big.

This fabric would be perfect for any sweatshirt, cardigan, or loungewear pattern. When the shipment first arrived, my husband said it felt just like his sweatpants from J.Crew (so obviously he's now been hinting at a pair of Hudson Pants...)
Need some ideas for other patterns that would pair well with this fabric? How about:
Linden Sweatshirt
Ali Sweatshirt
Toaster Sweater
Phinney Ridge Cardigan
Jeanne T-Shirt/Dress
Elliot Sweater
Rise & Fall Turtleneck
Anima Pant
Jarrah Sweater
Blackwood Cardigan
Fauntleroy Sweater
Sloane Sweatshirt
Ali Sweatshirt
Toaster Sweater
Phinney Ridge Cardigan
Jeanne T-Shirt/Dress
Elliot Sweater
Rise & Fall Turtleneck
Anima Pant
Jarrah Sweater
Blackwood Cardigan
Fauntleroy Sweater
Sloane Sweatshirt
Now. Let's talk ribbing...
I am so excited to have finally found some fun ribbings to add to the shop! Because you can never have enough stripes - right?! I think they're perfect when paired with a solid fabric...it adds just a little something special to the project.

That said, there is a bit of a learning curve to working with these! I'll be honest that I wasn't super happy with my first attempt. Hopefully you can at least learn from my mistakes!
These ribbings come in pre-cut lengths of 1.2-1.5 yards each (depending on the style). I needed almost a whole cut for the waistband, and then used a second cut for the sleeve cuffs. I think I probably have enough left over to use as the cuffs on some Hudson Pants or the sleeves of another project. But definitely measure your pattern pieces if you're unsure!
The general rule-of-thumb is that your ribbing should measure about 75-90% of your hem or cuff measurement, depending on your fabric. For this project, the ribbing for my hem is about 90% of the hem circumference. It isn't super tight around my waist, but it brings the hem in slightly.
I would recommend starting with a cut that's 90% of your hem measurement and baste it on using a wide zig-zag stitch. Try it on, see what you think, and adjust to make it tighter as needed. Different fabrics are going to interact with the ribbing in different ways, so you'll want to test it first. But trust me when I say that you don't want to try to unpick a serger seam with these ribbings - it just won't work! Don't ask how I know...

I found that the best way to sew the ends of the band together is with a serger. Leave your serger threads long when you cut them and then use a darning needle to pull the threads back through the seam you just sewed. This will ensure that the cuff doesn't start pulling apart as you wear it. I'm sure you could do something similar with a zig zag stitch and a regular machine, just backstitch at the end to secure it.
Then, you'll attach your hem or cuff just as you normally would! I marked my hem into quarters (indicating center front, center back, and both side seams), then pinned it to the body of my project and serged it on, just as I would a self-ribbing.
Here's the most important part: PRESS THE HECK OUT OF IT! The ribbing is likely going to be much thicker than your main fabric and will therefore cause some puckering as it pulls your fabric back in on itself. I really didn't like the way it looked when I first put my sweater on and was somewhat disappointed, thinking I did something wrong. But don't give up! Just press it really well, just as you would a normal knit neckband, cuff, or hem.
And that's all there is to it! I can't wait to see the combinations that you all put together with these!